- Professional Construction Software Solutions
- 480-705-4241

Bluebeam Revu: Site Planning 101
February 5, 2015Bluebeam Tips: Notes with Icons
March 10, 2015With the Revu 2015 Bluebeam’s Cloud+ will save you many clicks in your PDF markups work, and while it is present in the Markup | Shapes it is not automatically added to your tool bars, tool chest, tool sets and profiles. If your firm has many licenses of Revu (Standard, CAD or Extreme), and your save your profiles in a network drive, check with your systems administrator before proceeding. Only one person needs to perform all these steps, as you can import or export the profiles to email them to other Revu users in or outside your firm.
The first place you’ll want to add Cloud+ is to your Construction Profile’s toolbar on the right panel. Make sure you’re in the Construction Profile, then:
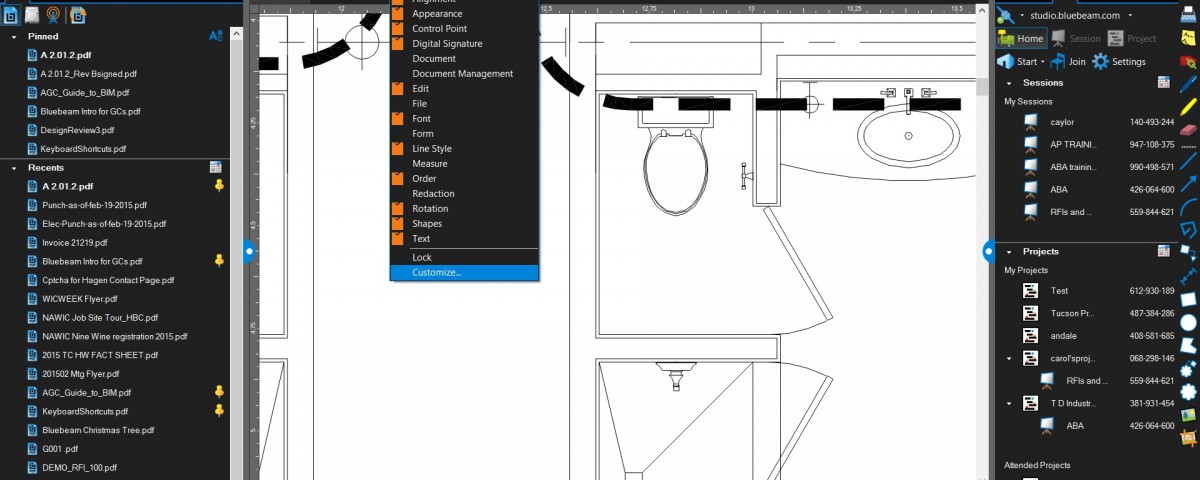
1. Navigate to View | Toolbars | Customize.
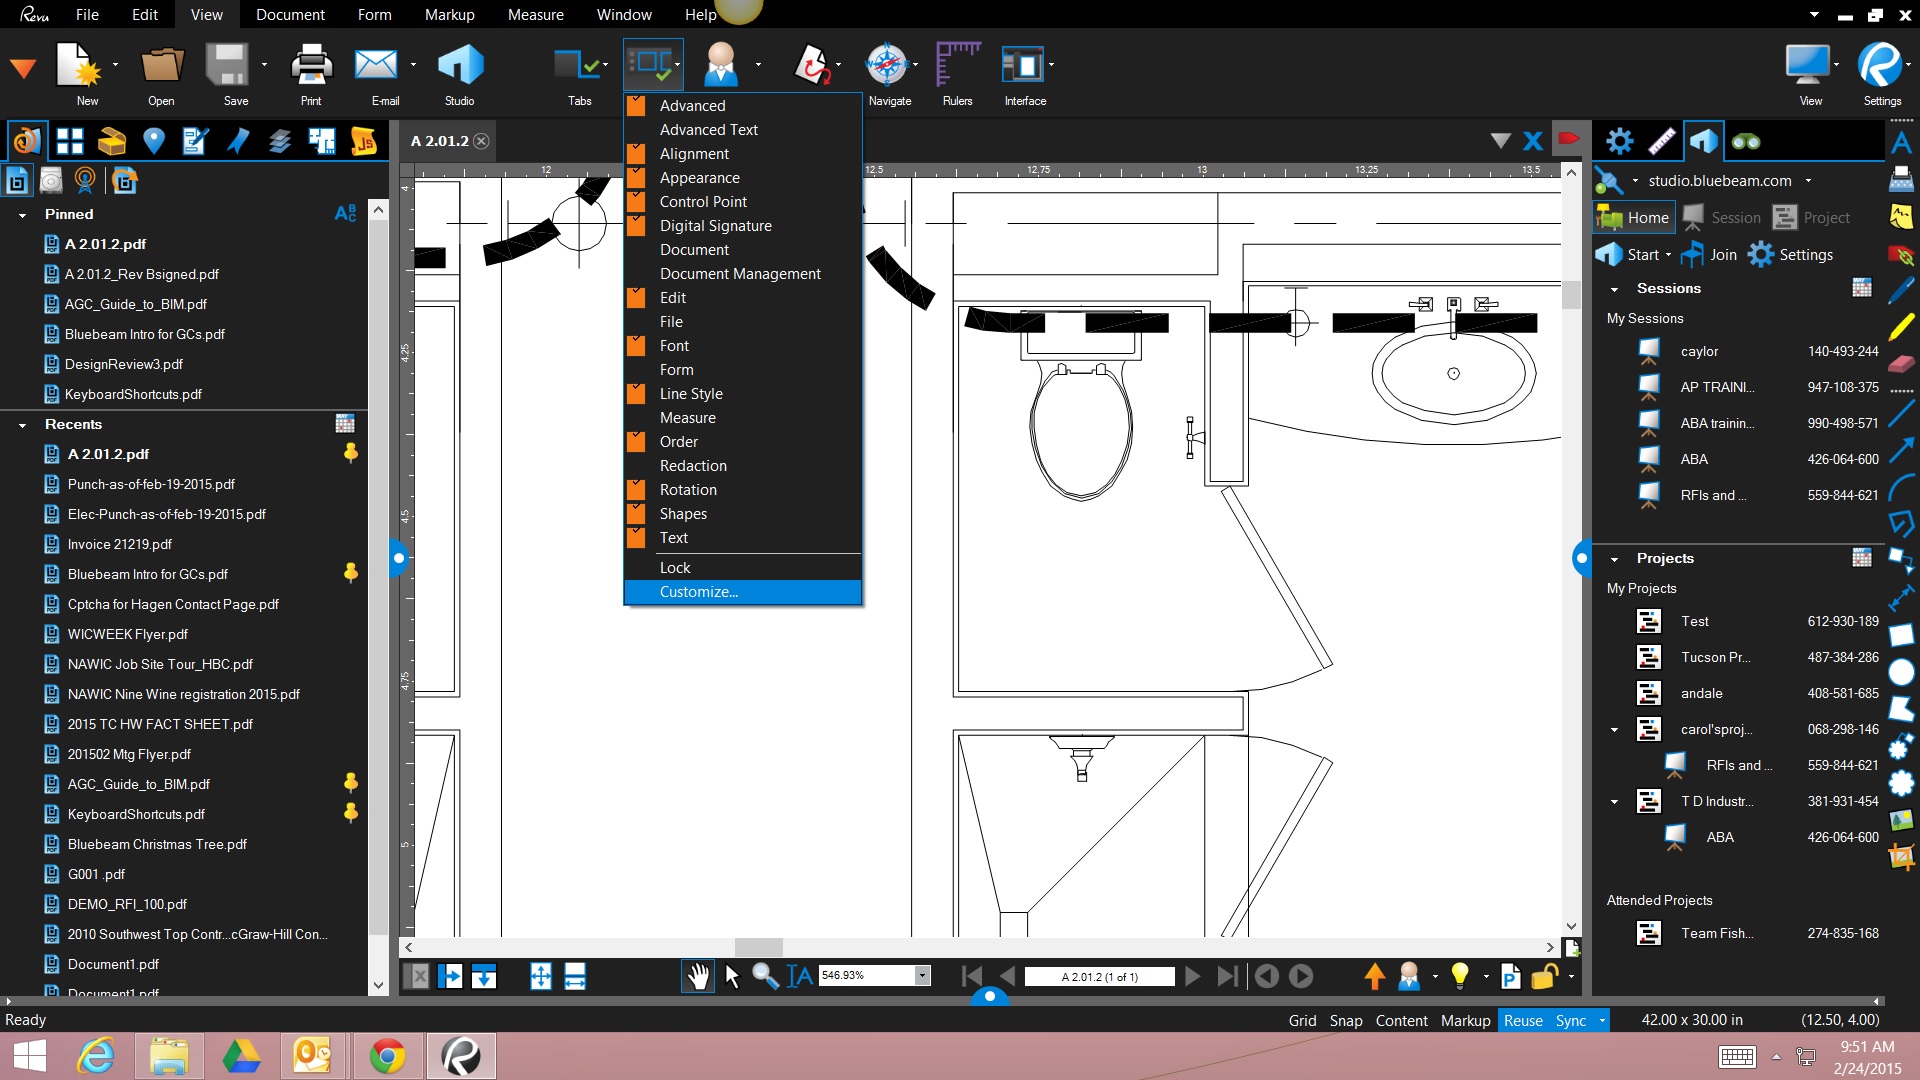
2. Change the Toolbar categories to either Markup or All.
3. Scroll down the Commands and click on Cloud+. 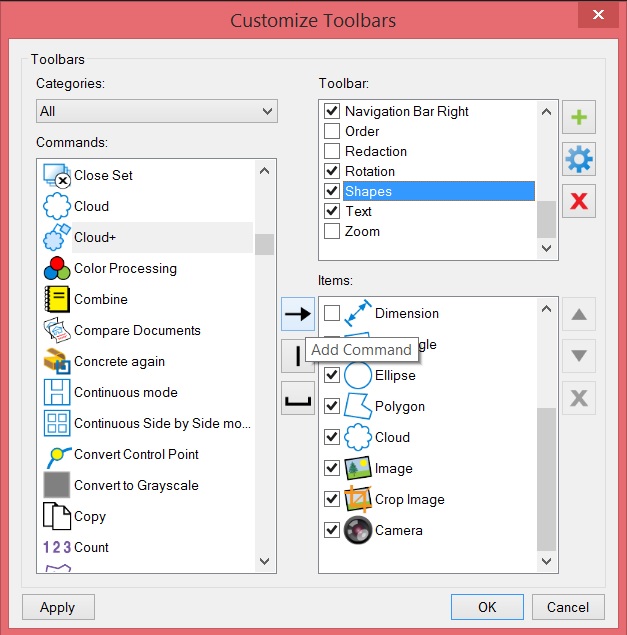
4. In the Toolbar section select Shapes so the shapes appear in Items section.
5. Click the right arrow symbol (add command) so that the Cloud+ tool appears in the Item section.
6. Use the Up/Down arrows to position the Cloud+ just above or below the Cloud tool.
7. Click OK to Save it.
Repeat this process in any profile and on any toolbar you want Cloud+ added.
The second place to add Cloud+ is in the Design Review Profile so that the Architect’s, Engineer’s and Contractor’s Review Tool Sets had the Cloud+ in their appropriate color scheme. Make sure you are in the Design Review Profile with any PDF document opened.
1. Place a Cloud+ markup on the document (if you haven’t added it yet to this profile, you’ll find it in Markup | Shapes or use the shortcut “K”.
2. With your Tool Chest in the left panel, right click on the cloud tool in the Architect’s Review Tool Set, and select the Paint Format and click on the cloud portion of the Cloud+ markup you already have placed. This paint the cloud portion of the Cloud+ with the Architect’s color palette. 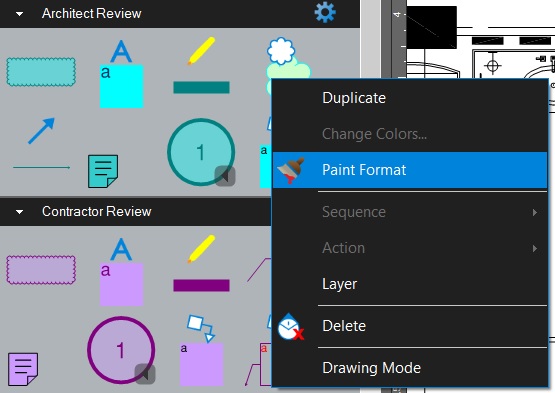
3. Click ESC to exit Paint Format.
4. Drag and drop the Cloud+ (now with the Architect’s color palette) from the Recent Tools to the Architect Review Tool Set
5. Right click on the Callout tool in the Architect’s Review Tool Set, and select the Paint Format and click on the callout portion of the Cloud+ markup you already have placed. This paint the callout portion of the Cloud+ with the Architect’s color palette.
6. Repeat steps 2 ,3 and 4 for the remaining Engineer’s and Contractor’s Review Tool Sets. And any other custom tool Sets you may have created for other collaborators.
7. View | Profiles (the arrow next to profiles) and click Save Profile
To Import or Export Profiles so you can share these changes with others, search for Importing and Exporting Profiles in the Help menu (F1).




1 Comment
[…] Bluebeam 2015 Tip: How to Add Cloud+ to Profiles, Tool Chest and Tool Bars […]