- Professional Construction Software Solutions
- 480-705-4241

Arizona Sales Tax Prime Contracting Examples for 2015: How to Receive Automatic Updates
December 1, 2014
Bluebeam Tutorial: How to convert Outlook emails to PDF
December 17, 2014How to General Contractors help a project Owner Visualize the Project’s Percentage of Completion? It’s difficult. I’ve seen many spreadsheets, reports, thousands of photos and AIA Schedule of Values all attempting to convey to the owner just how far along their project is. The problem is most owners need visuals. Photos are great for seeing what’s done but it’s a lousy way to convey an overall status on the project. There is a better way with Bluebeam Revu by creating a custom tool set and utilizing custom statuses in the worklist.
Understanding what is done, who you are waiting on, and how the project is progressing can be difficult to convey. Especially in complex projects. Using a simple approach with the floorplan, setting work areas (using spaces) and embedding symbols for each trade (a custom tool set) in all work areas can help. The status and color of the trade’s symbol in each work area can convey whether materials are staged, what’s started, what’s 50% complete, what’s finished, etc., and when all trade work is complete in a work area, the entire space can be colorized as complete. Just slap a legend on the floorplan and the owner will understand without having to analyze spreadsheets or read a report.
Creating the custom tool set can be a little tedious.
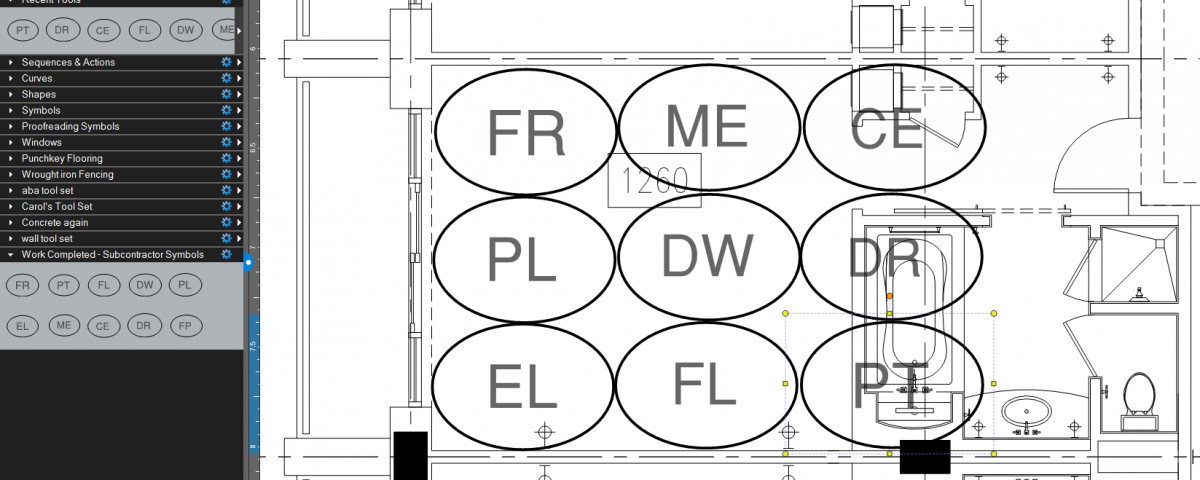
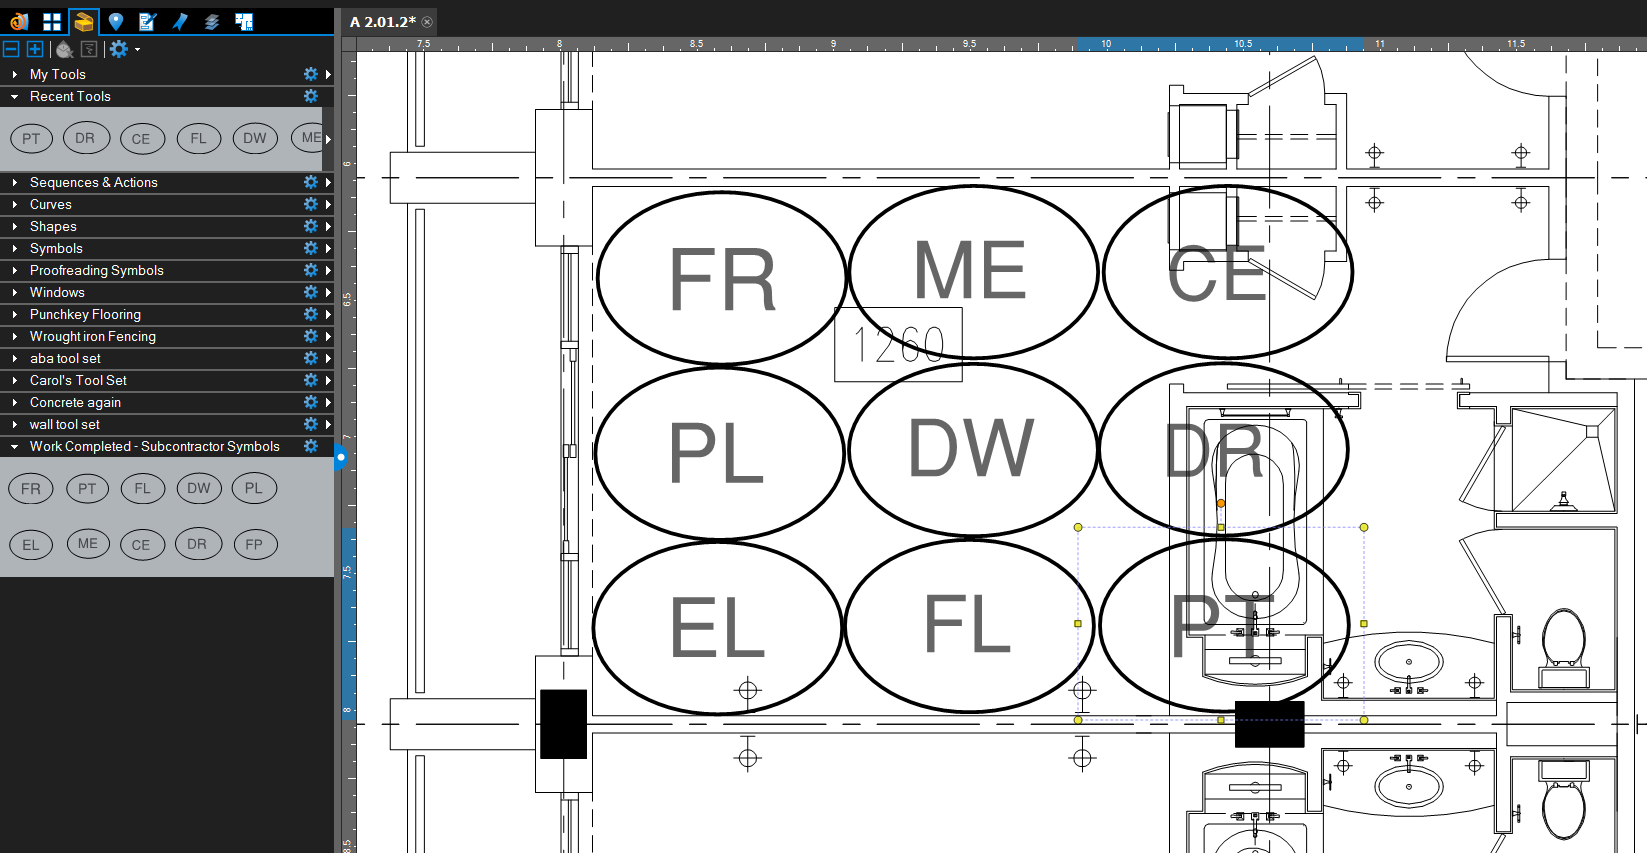
1. Place an Ellipse markup on a PDF in an oval shape.
2. Add a text box inside the oval with a 2 character abbreviation for the trade.
3. Use the Lasso Tool, right click and Group the ellipse markup and text markup together
4. Change the Properties of this tool and provide the full name of the trade (ie. electrical, drywall, etc) You may also want to change the opacity.
5. Add this tool to a new tool set in your tool chest (you may want to call this Work Completion by Trade/Specialty/Sub or Work Pct Compl by Sub), either by right clicking and adding to a tool set or dragging and dropping the tool from the Recents Tool Set to another tool set (as the recents will clear when you close Revu).
6. Repeat for as many trades as you want to track.
To help all my Bluebeam readers, I’ve created a tool set for you that you can import and use as a template to get you started with 10 symbols for Framing, Plumbing, Mechanical, Electrical, etc. Click here to download this tool set and make modifications. I suggest you create the custom Status Model detailed below and tool set in a Custom Profile called Work Completed Status for Owner. Consider it a early Christmas present as I know all Bluebeamers have been good this year!
Once you have this imported into your tool chest, you’ll want to create your own custom statuses for Material Staged, Trade Started, 50% Complete, 90% Complete, 100% Complete. A sample of what you might want is shown below. Note that each State is color coded differently and that you will want to add a legend onto the floorplan so your owner know what each color means.
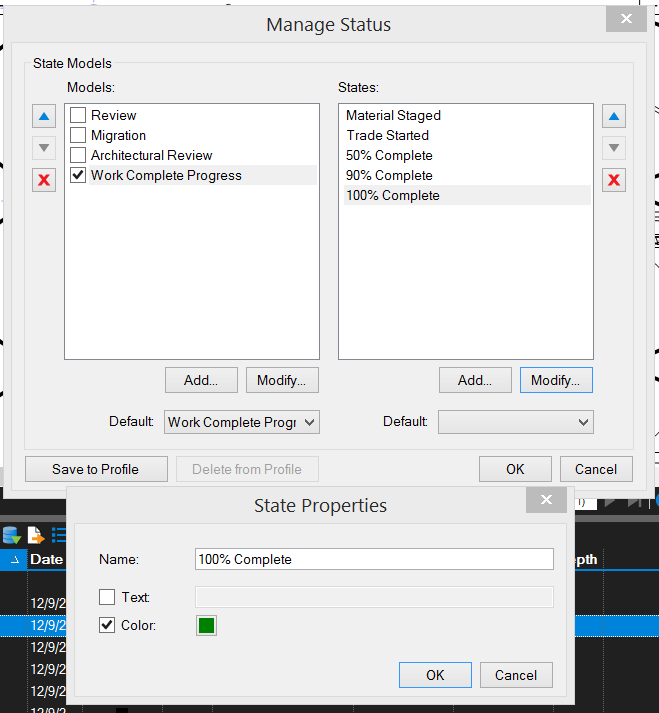
To get to the Manage Status dialogue box, go to the worklist and click on the gear next to the Status Icon (looks like a traffic light). Then add the new Model on the left, check the newly created model and then add your custom statuses for that model on the right. Here’s what it looks like in use: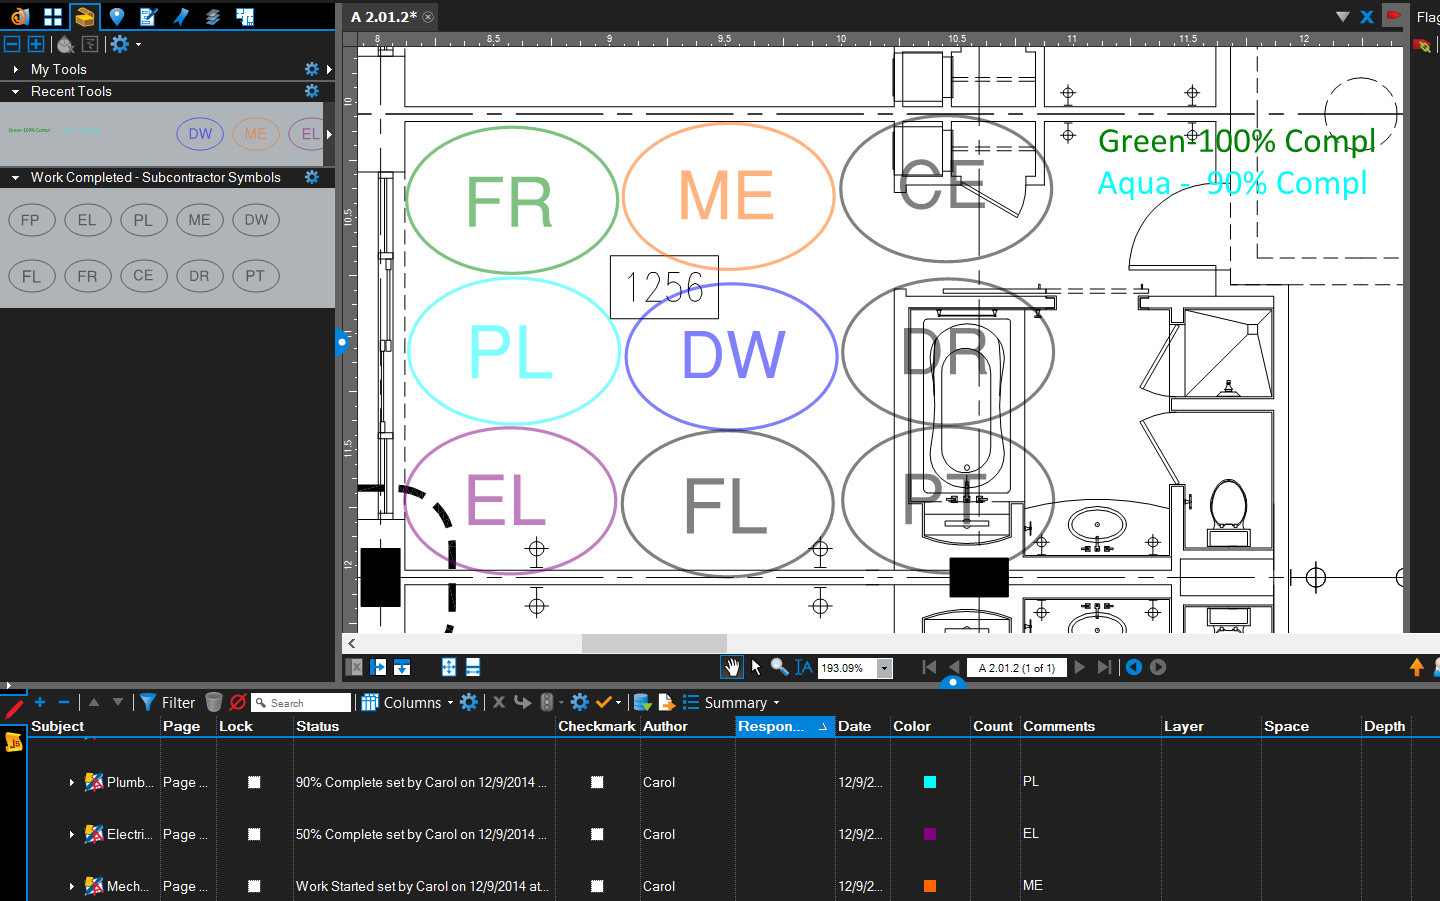
Since you’ve read to the end of the post I’m also providing this download to my custom “Work Completed for Owner” Profile so feel free to modify the status colors and create your own legend.
You can use similar methods for creating multilevel approvals for the punch and back check, design and constructability reviews, etc.
There’s another gift coming tomorrow so be sure to check back on this blog, especially if you need a few more Bluebeam Revu licenses.

